
When the First Frame Looks Right but the Video Doesn't: An Image-to-Video Debugging Protocol
A controlled way to turn one approved still into motion without losing track of what must stay accurate.
By xiaoyu · prepared for VidKiss Field Notes on Hashnode
Disclosure: I work on VidKiss, and the single product link below points to our image-to-video workspace. The production brief in this article is illustrative; it is not a claim that a particular render or client project occurred. The workflow describes checks you can perform on your own output.
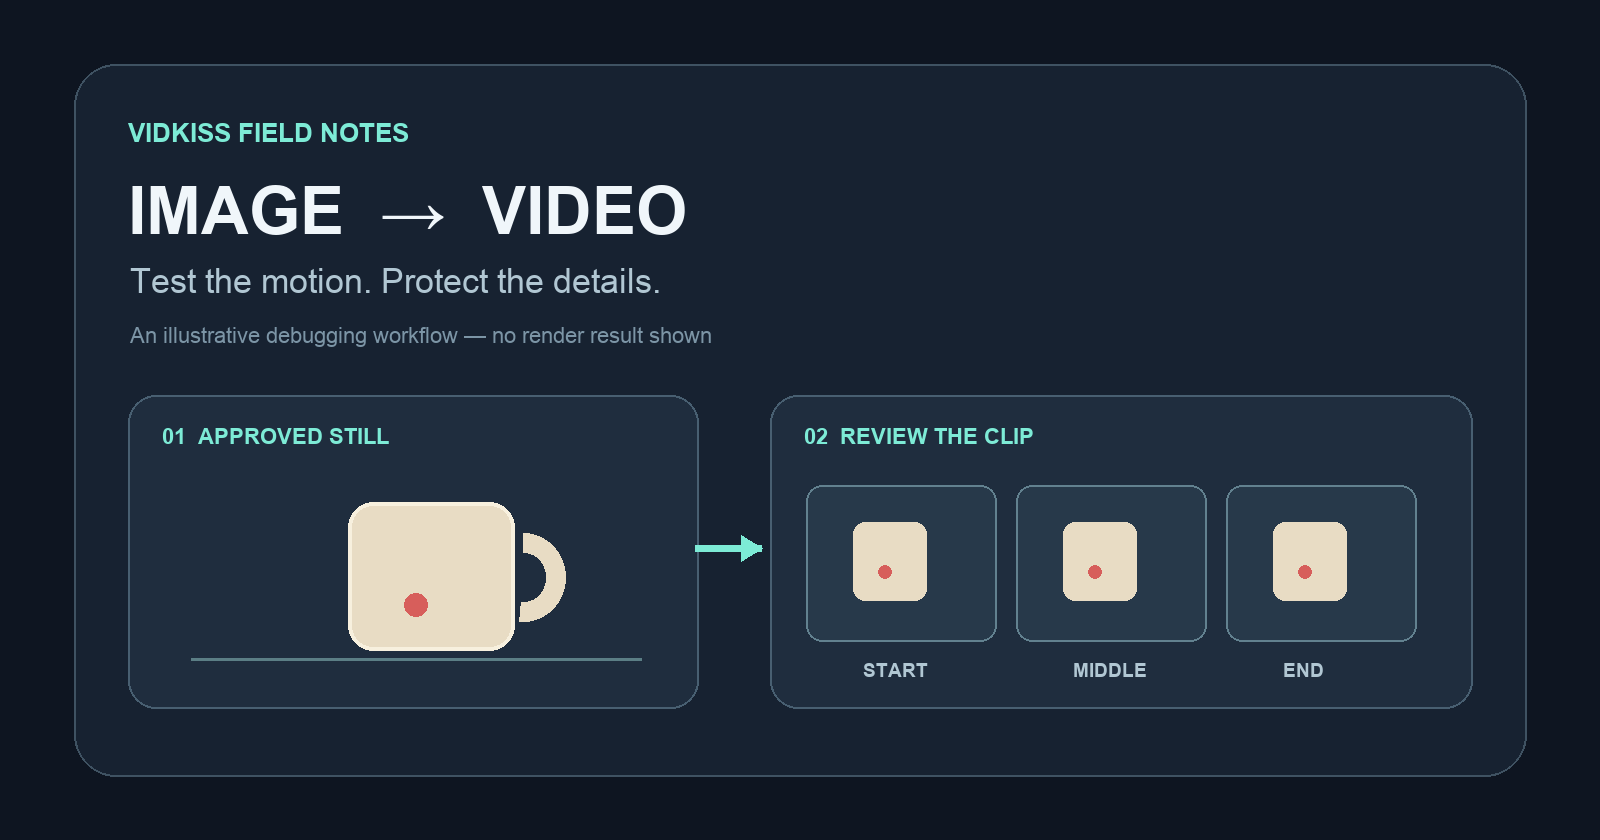
Imagine that a product team has approved one still image for a launch. The subject is centered, the background is clean, and a small red mark on the object is where it belongs. At the end of the day, someone asks for a short version that moves. The creative brief sounds modest: a slow camera push, a little motion in the background, the product itself unchanged.
That last phrase is where a quick job becomes a difficult one.
An image-to-video model can use the uploaded image as its first frame and generate the frames that follow. The opening may look reassuringly familiar. But an approved still is not automatically a promise that every later frame will retain its exact outline, lettering, or label. You may notice a problem only when the clip loops in a phone-sized preview.
The obvious response is to add more words: “keep everything exactly the same, perfectly preserve the logo, don't change a single detail.” Then perhaps change the model, length, and framing at the same time. If the next result improves, you cannot tell which change helped. If it fails, you have bought no useful information with that run.
Here is a more controlled way to approach the request.
Start with the decision the video has to survive
Before opening a generator, write one sentence describing the intended use: “A vertical social teaser should add a gentle push-in to this approved product still.” Then list the details that a reviewer would reject if they changed. For the illustrative object above, those might be the silhouette, handle, and red mark. A real product may also have a trademark, packaging text, or a regulated claim.
Separate recognizable from pixel-exact. A concept clip can tolerate some interpretation. A catalog listing or a paid advertisement with legally approved artwork may not. If exact pixels must remain fixed, a conventional editor can animate the still with a pan, zoom, or layered parallax while keeping the original product pixels. Use generative motion only when you are willing to inspect, revise, or replace the result.
This is the first useful fork in the workflow. It can save more time than any prompt trick.
| Requirement | Safer first route | Review question |
|---|---|---|
| Exact logo, text, or product geometry | Timeline animation or compositing | Are the approved pixels still present? |
| New motion around a reference image | Image-to-video test | Do the protected details survive the entire clip? |
| A completely new scene | Text-to-video exploration | Does the new scene meet the brief at all? |
Why the first frame is a misleading comfort
Your still is a strong starting constraint, not a lock on the future. The model has to synthesize motion and new frames. If the prompt asks for a rotating object, a fast orbit, a hand covering the label, and dramatic lighting at once, it asks the system to invent many details that the single source frame never showed.
That explains the common failure pattern: the clip begins with the right object, then a defining feature changes as motion becomes more ambitious. This is a mechanism to test for, not a guarantee that every model will fail in the same way.
Reduce the number of unknowns in the first run. Keep the camera move small. Avoid inventing the back of an object if the source only shows its front. Leave a little space around the subject so that a modest move does not crop it out of the frame. If the source has tiny type that must be exact, plan to overlay the approved type in a normal editor after the render, or use a pixel-preserving workflow from the start.
Run one diagnostic pass, not a prompt lottery
Use a single source image you own or have permission to animate. Save the original. Write down the model, aspect ratio, resolution, clip length, and displayed credit estimate before you submit anything. Then describe one motion that would solve the brief:
Use the uploaded still as the opening frame. Keep the product near the center. Make a slow, steady camera push toward it while the background has subtle motion. Avoid a camera orbit, extra objects, new text, or a change in the product's color.
The constraints make the request clearer, but they do not force pixel-perfect preservation. Review the resulting clip frame by frame. Capture the opening, midpoint, and last frame. Compare each one against the approved still at the size where the audience will see it.
If the object drifts, change one variable for the next run. Simplify the camera instruction or shorten the clip or improve the source crop. Do not change all three and then call the new result a victory. Keep a tiny log:
| Run | Source / model / format | One change | First visible failure | Decision |
|---|---|---|---|---|
| A | Record your actual settings | Baseline gentle push | Your observation | Use, revise, or stop |
| B | Same settings unless named | One targeted adjustment | Your observation | Compare with A |
These rows are a template, not test results. Fill them only after you have rendered and inspected your own clips.
Put the tool at the actual bottleneck
Once the still, protected details, and motion plan are clear, you need a place to test that motion. In the VidKiss image-to-video workspace, you can upload one still, write the motion prompt, choose from the settings offered by the selected model, and see the credit cost before generating. The uploaded image supplies the opening frame. It does not make the entire clip an exact copy of that image.
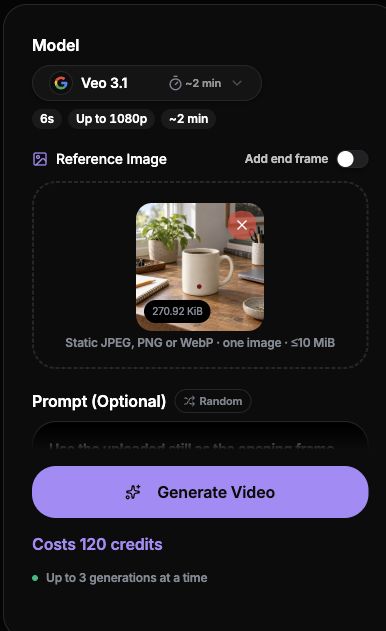
Actual workspace screenshot before generation. The uploaded mug is a fictional test asset; no video result is claimed here. The settings and credit cost shown are an example, not a fixed price for every model.
Do not start with a batch of dramatic variations. Start with one short diagnostic clip. If it passes, finish the piece in an editor: add exact text, music, a call to action, and any approved brand assets. If it fails because a protected feature keeps changing, stop paying for more prompt attempts and animate the original still through a conventional timeline instead.
The check that matters after the render
Watch the clip once with the sound off and once at phone size. Then freeze three frames. Is the product recognizable immediately? Does the protected mark stay where it should? Does the movement add meaning, or does it merely make the picture busier? If the output is only a concept, label it as such in your review process.
The point of this protocol is not to make every image-to-video render succeed. It is to know quickly whether the technique suits this asset and this placement. An approved still, a narrow motion brief, one controlled test, and a clear stop rule can turn a vague creative request into a decision you can defend.
P.S. Before your next generation, pause on the source image and circle the one detail that must not change. If you cannot name it, you are not ready to judge the clip. If it must remain pixel-exact, choose an editing route that actually preserves those pixels.